Labview realizes serial communication
The serial port sends and receives bytes in bits. Serial communication refers to a communication method between a peripheral device and a computer to transmit data by bit through a data signal line, a ground line, a control line, and the like. This communication method uses less data lines and can save communication costs in long-distance communication, but its transmission speed is lower than parallel transmission.
The serial port sends and receives bytes in bits. Although slower than parallel communication in bytes, the serial port can receive data with one line while using one line. It is simple and capable of long distance communication. For example, when IEEE488 defines the parallel traffic state, the total length of the specified device line must not exceed 20 meters, and the length between any two devices must not exceed 2 meters; for the serial port, the length can reach 1200 meters. Typically, the serial port is used for the transmission of ASCII characters. Communication is done using three lines, which are ground, transmit, and receive. Since serial communication is asynchronous, a port can send data on one line while receiving data on another line. Other lines are used for handshaking, but they are not required. The most important parameters for serial communication are baud rate, data bits, stop bits, and parity. These parameters must match for the two ports that are communicating.
Second, LabVIEW IntroductionLabVIEW is a program development environment developed by National Instruments (NI), similar to the C and BASIC development environments, but the significant difference between LabVIEW and other computer languages ​​is that other computer languages ​​generate code in a text-based language. LabVIEW uses a graphical editing language G to write programs, and the resulting programs are in the form of block diagrams. LabVIEW software is at the heart of the NI design platform and is ideal for developing measurement or control systems.
LabVIEW Features
As far as possible, the general hardware is used, and the difference between the various instruments is mainly software.
Can fully utilize the power of the computer, with powerful data processing functions, can create more powerful instruments.
Users can define and manufacture various instruments according to their needs.
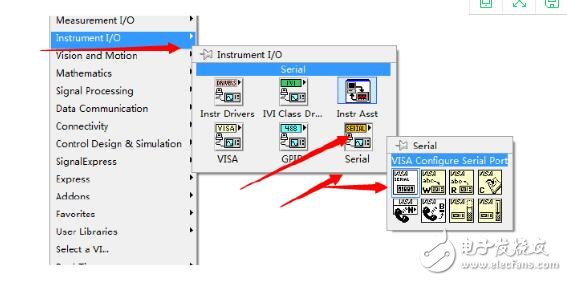
Third, Labview realizes serial communication steps1. Add VISA configuration interface on the program panel
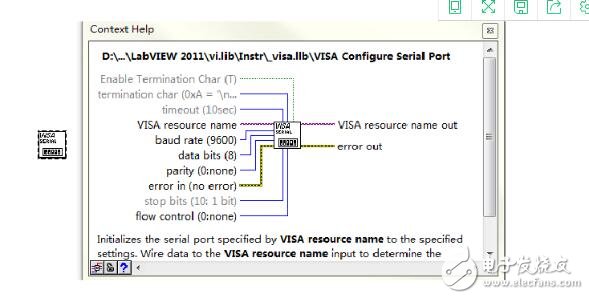
2. After adding, open the display of the help document. Help->show context help of the menu, as shown below

The mouse selects the target and a help box is displayed. As shown below.
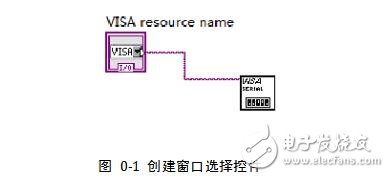
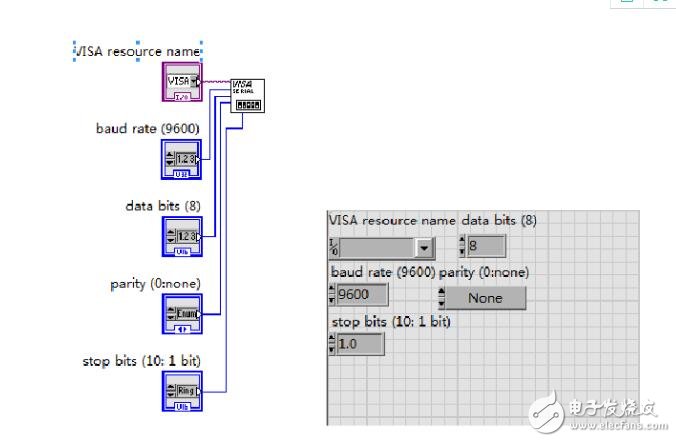
3. Create the appropriate configuration
In the program panel, move the mouse to the corresponding pin and click the right mouse button - "create-" control. After the creation, the corresponding control box will appear on the interface panel. Create a VISA resource name as shown below.
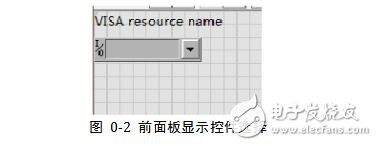
The front panel displays as follows:
4 sequentially created, baud rate, stop bit, data bit, etc.
As shown below.
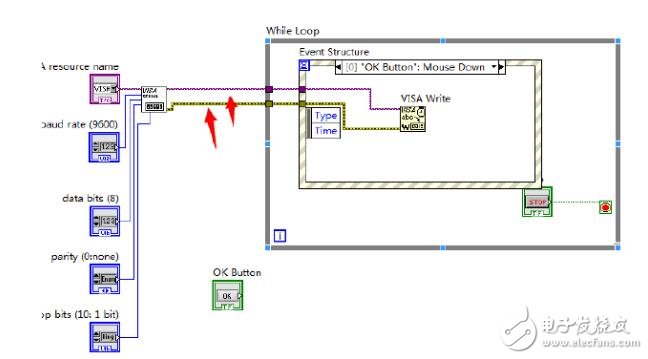
5. Create a while loop to place the sent program
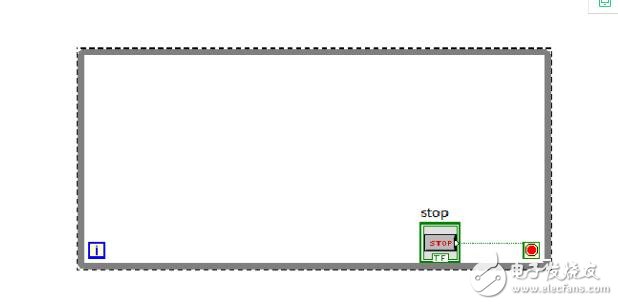
Move the mouse to the loop control pin to create a control. Used for debugging, no condition processing, will report an error.
6 front panel placed a button to control the transmission of data
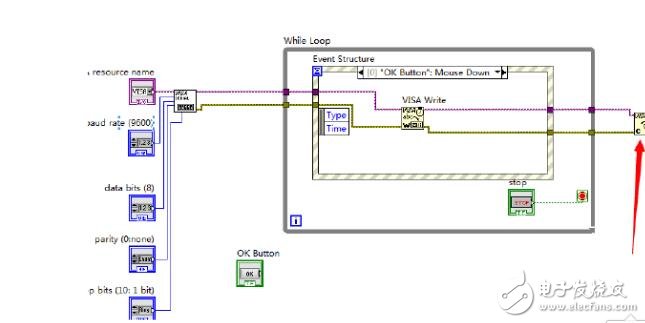
7. Create an event for the response send button
Move the mouse to the location of TImeout, right click and select edit events... as shown below.
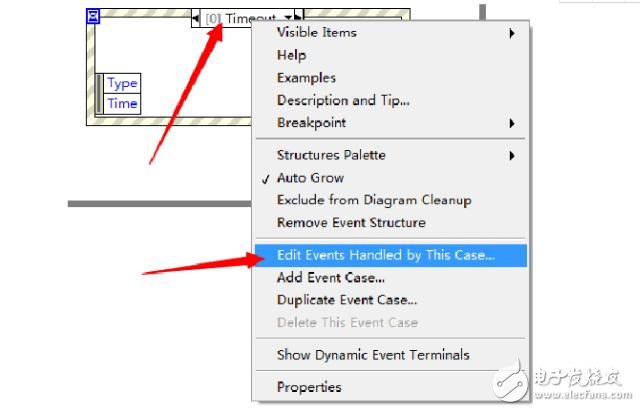
After the operation above, the following interface appears: select the control that needs to respond, select "ok button" here, select the mouse to press
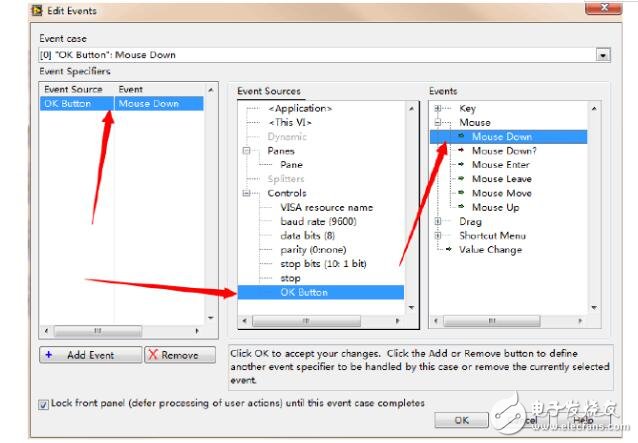
After clicking ok, the name of the event has also changed. As shown below.
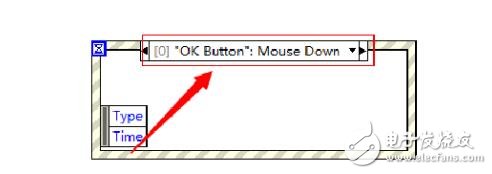
If the mouse clicks on the button, it will enter the event processing.
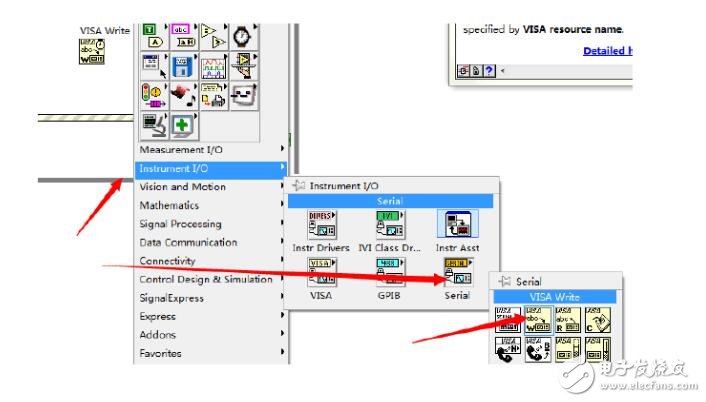
8. Create a VISA write function
9 connection port and write function
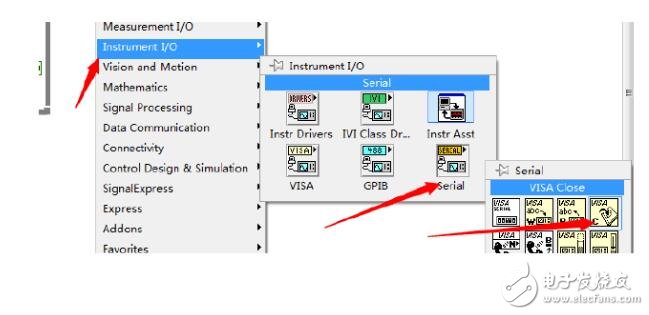
10 add a close function
11. Create a string control, passed to the write function, used to send
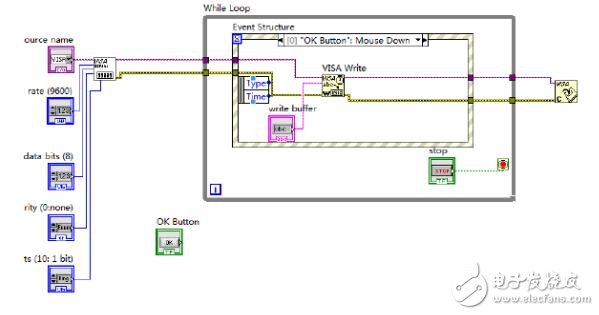
Select the write buffer of VISA Write, right click create-"control,
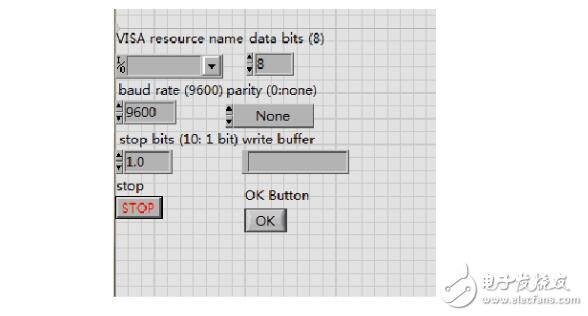
12 interface is as follows
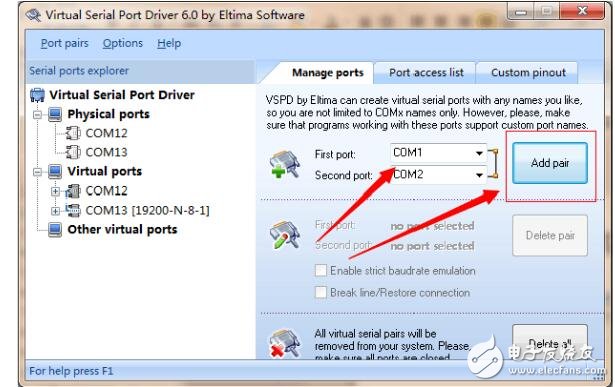
13. Install virtual serial port, provide a download address
Configure two ports with a virtual serial port. After the configuration, the two serial ports are automatically connected, and the two serial ports on the analog hardware are connected.
14 running serial port tool
15. Run the serial port tool, open the serial port, run the VI, and send the data.
My computer is configured with COM12 and COM13, vi selects COM12
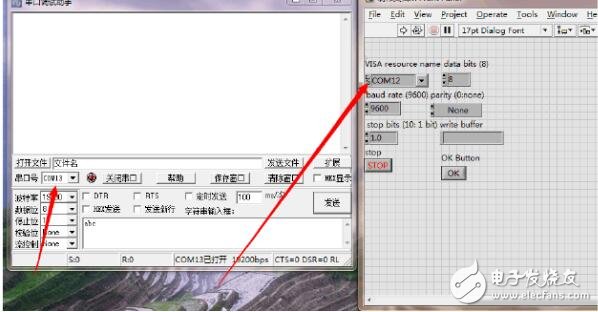
Run the VI, fill in the test in the write buffer, click OK to send.

Send once per click
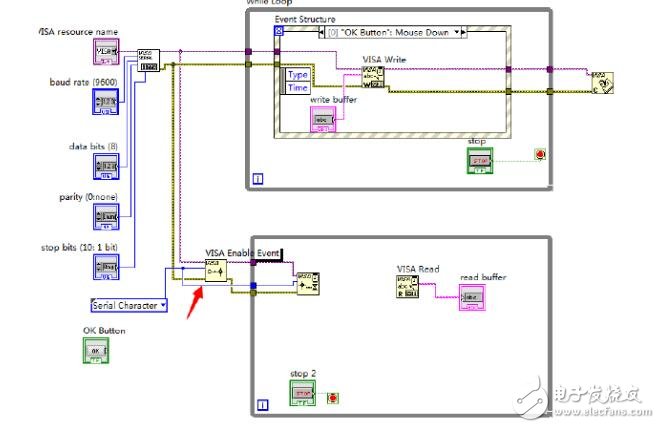
16. Establish the receiving module
Add a while loop,
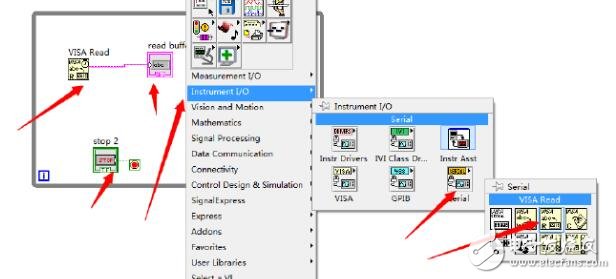
Create a while loop for receiving. Create VISA Read and click the right mouse button create-"indicator" on the Read buffer pin to create a display control.
17 Create a constant in the event type of the VISA Enable Event
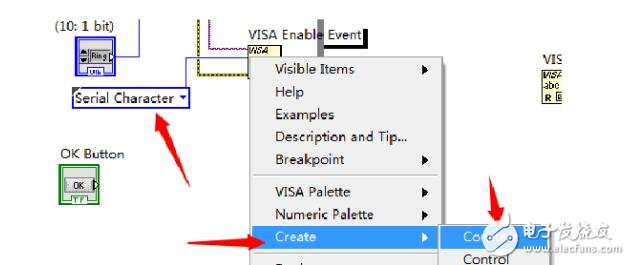
Then select Serial Character from the drop-down list of constants. This means that the serial port receives the data and can go to the help file for detailed instructions.
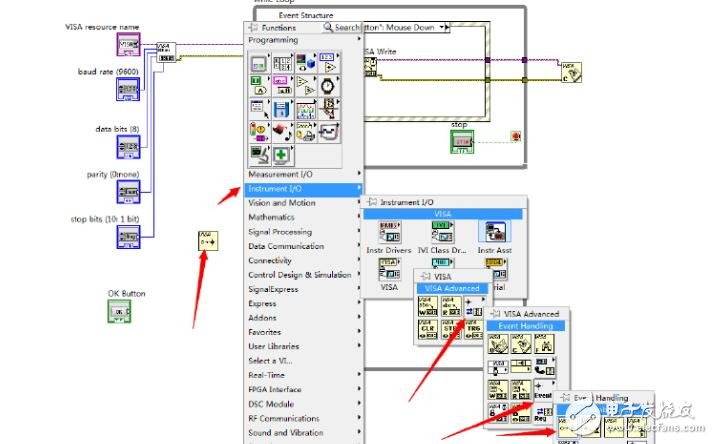
18. Create an event wait
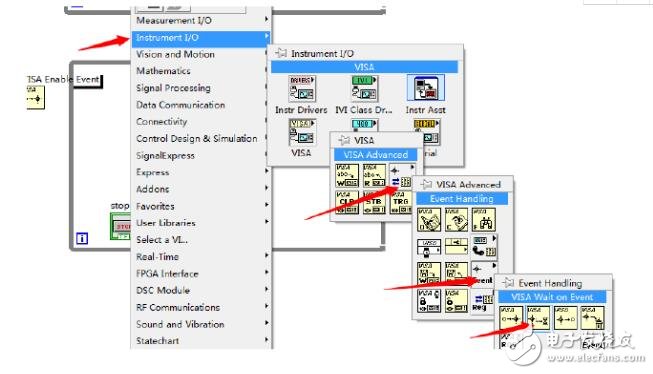
19. Connect the event, wait for the type of the event to connect directly to the Event type of the VISA Enable Event.
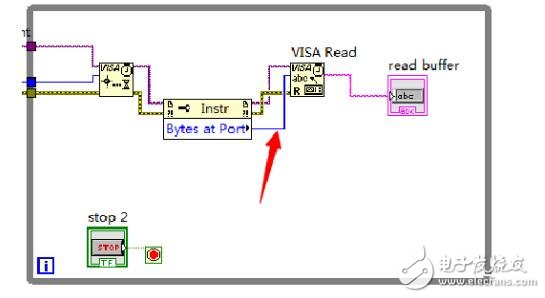
20. Add a property node, Visa Bytes at serial port, to get the number of bytes in the serial port

The number of bytes is connected, which tells the number of bytes that need to be read. It is also guaranteed to read the data in the serial port every time.
0.50Mm Pitch Series Connector,0.5Mm High Speed Board-To-Board Connectors,Double Slot Board-To-Board Connectors,Single Slot Board-To-Board Connectors
Dongguan SOLEPIN Electronics Co., Ltd , https://www.wentae.com